How to Get Started With Gista
Hey Everyone, it’s Octavio again here to bring you a tutorial on how to get started with Gista and implement it into your website!
- Create an Account
This part is pretty self explanatory, but for those that need extra help, follow along. So first as seen above, you're going to want to click on the “Sign Up” button located at the top right of the page, which should lead you to a page that looks like this:
Once here fill out the necessary information and click "Create Account"
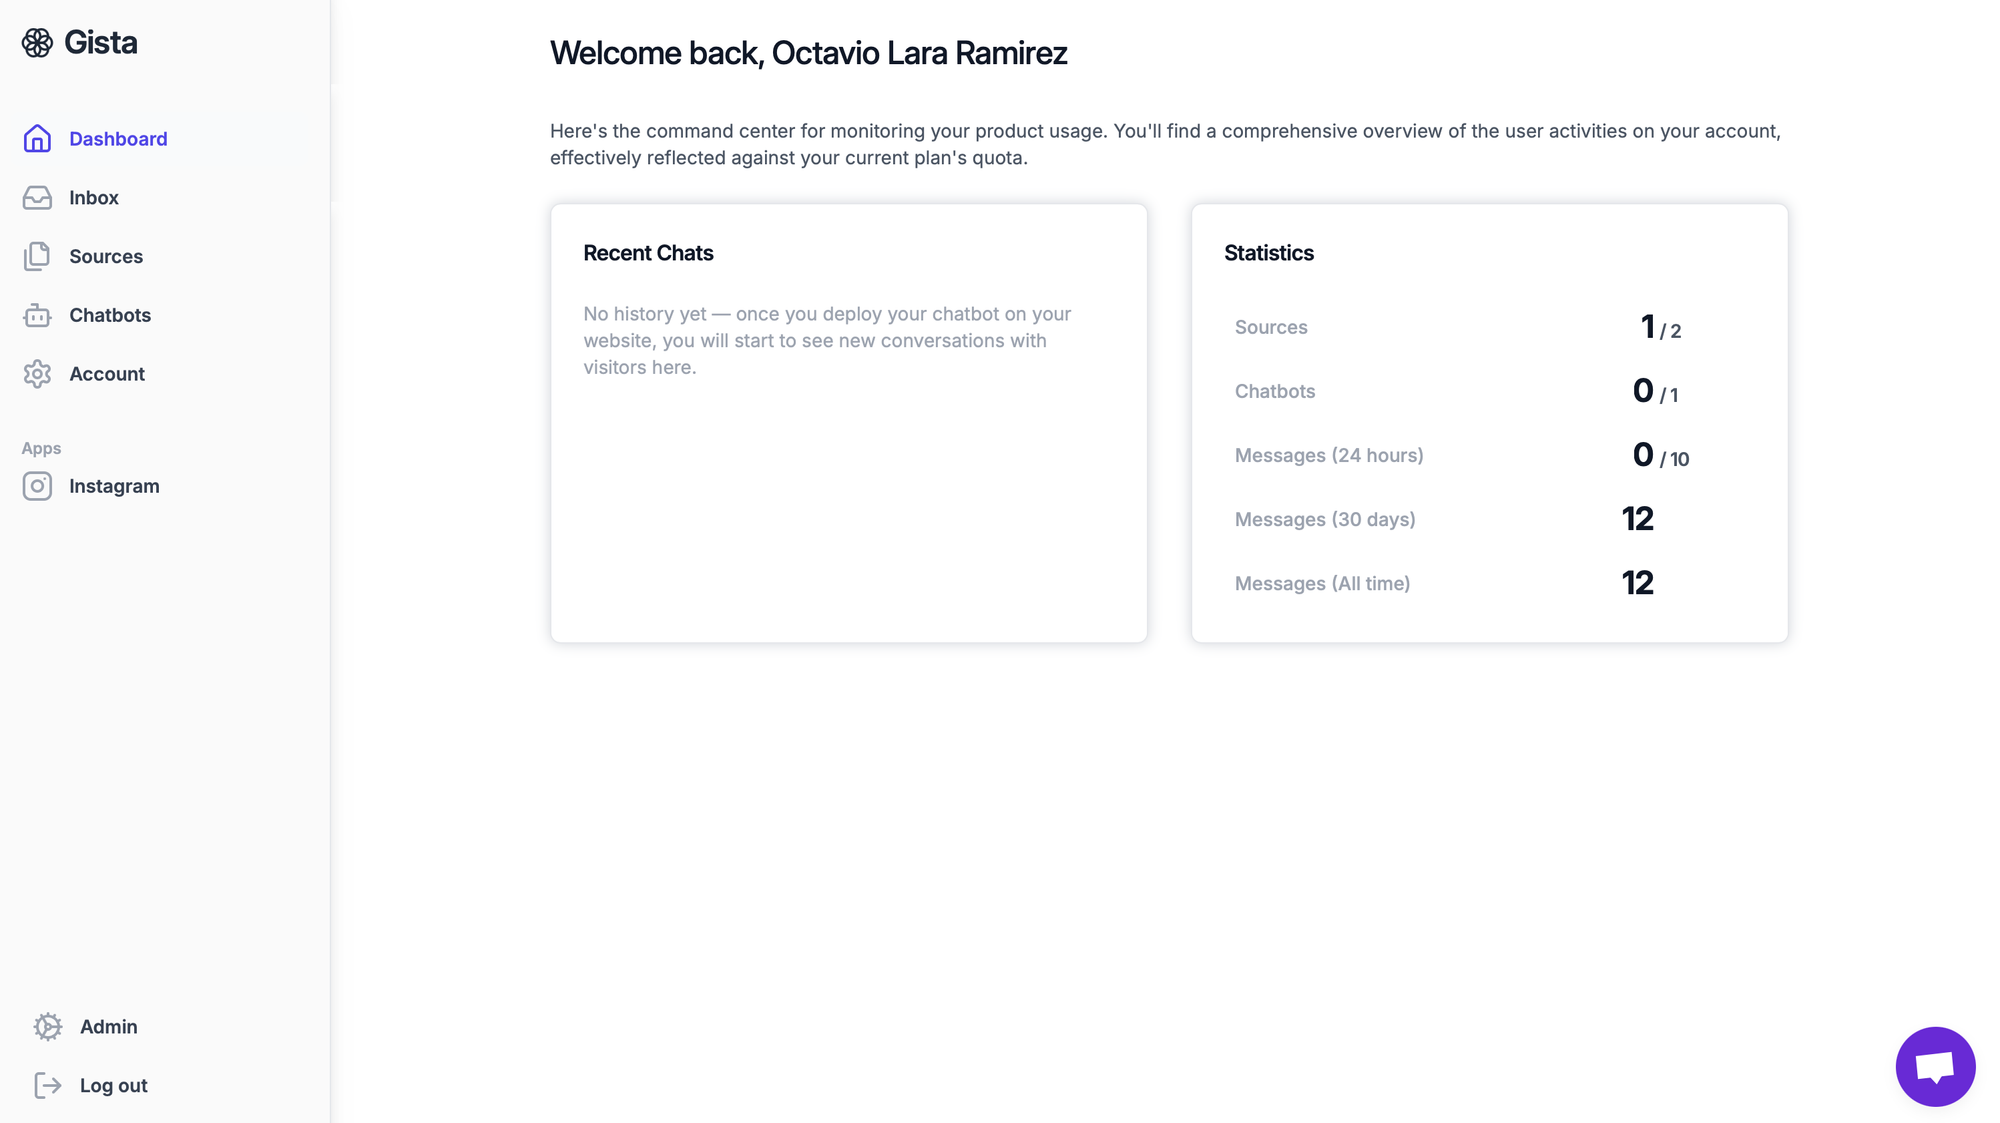
- Head to the Dashboard Page

Now you should be in the dashboard page. If not it will also be located towards the top right where the "Sign Up" was previously".
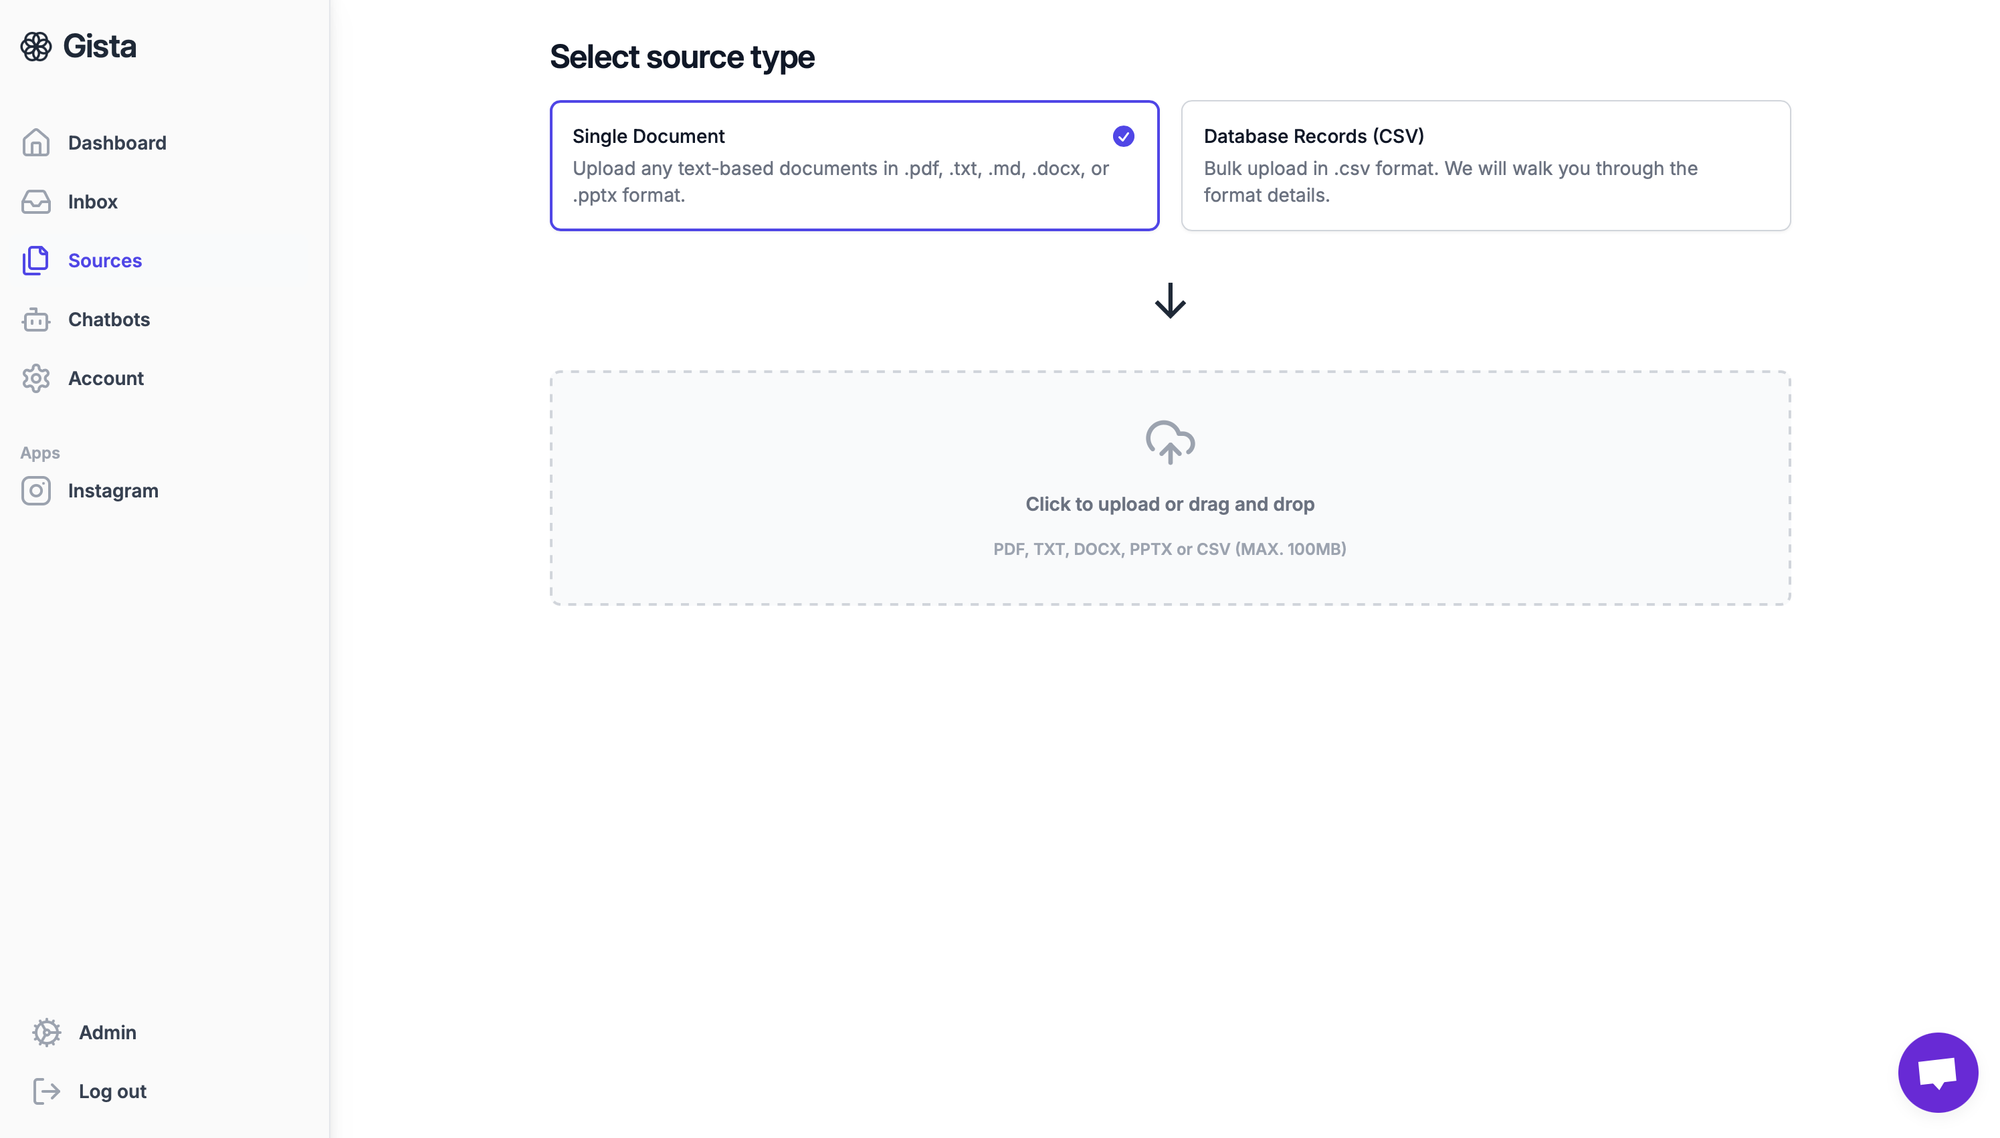
- Upload a Source

Once at the dashboard page, simply click on Sources and upload a source file of your choosing. The sources you use can be upload in any text based document or in bulk with CSV.
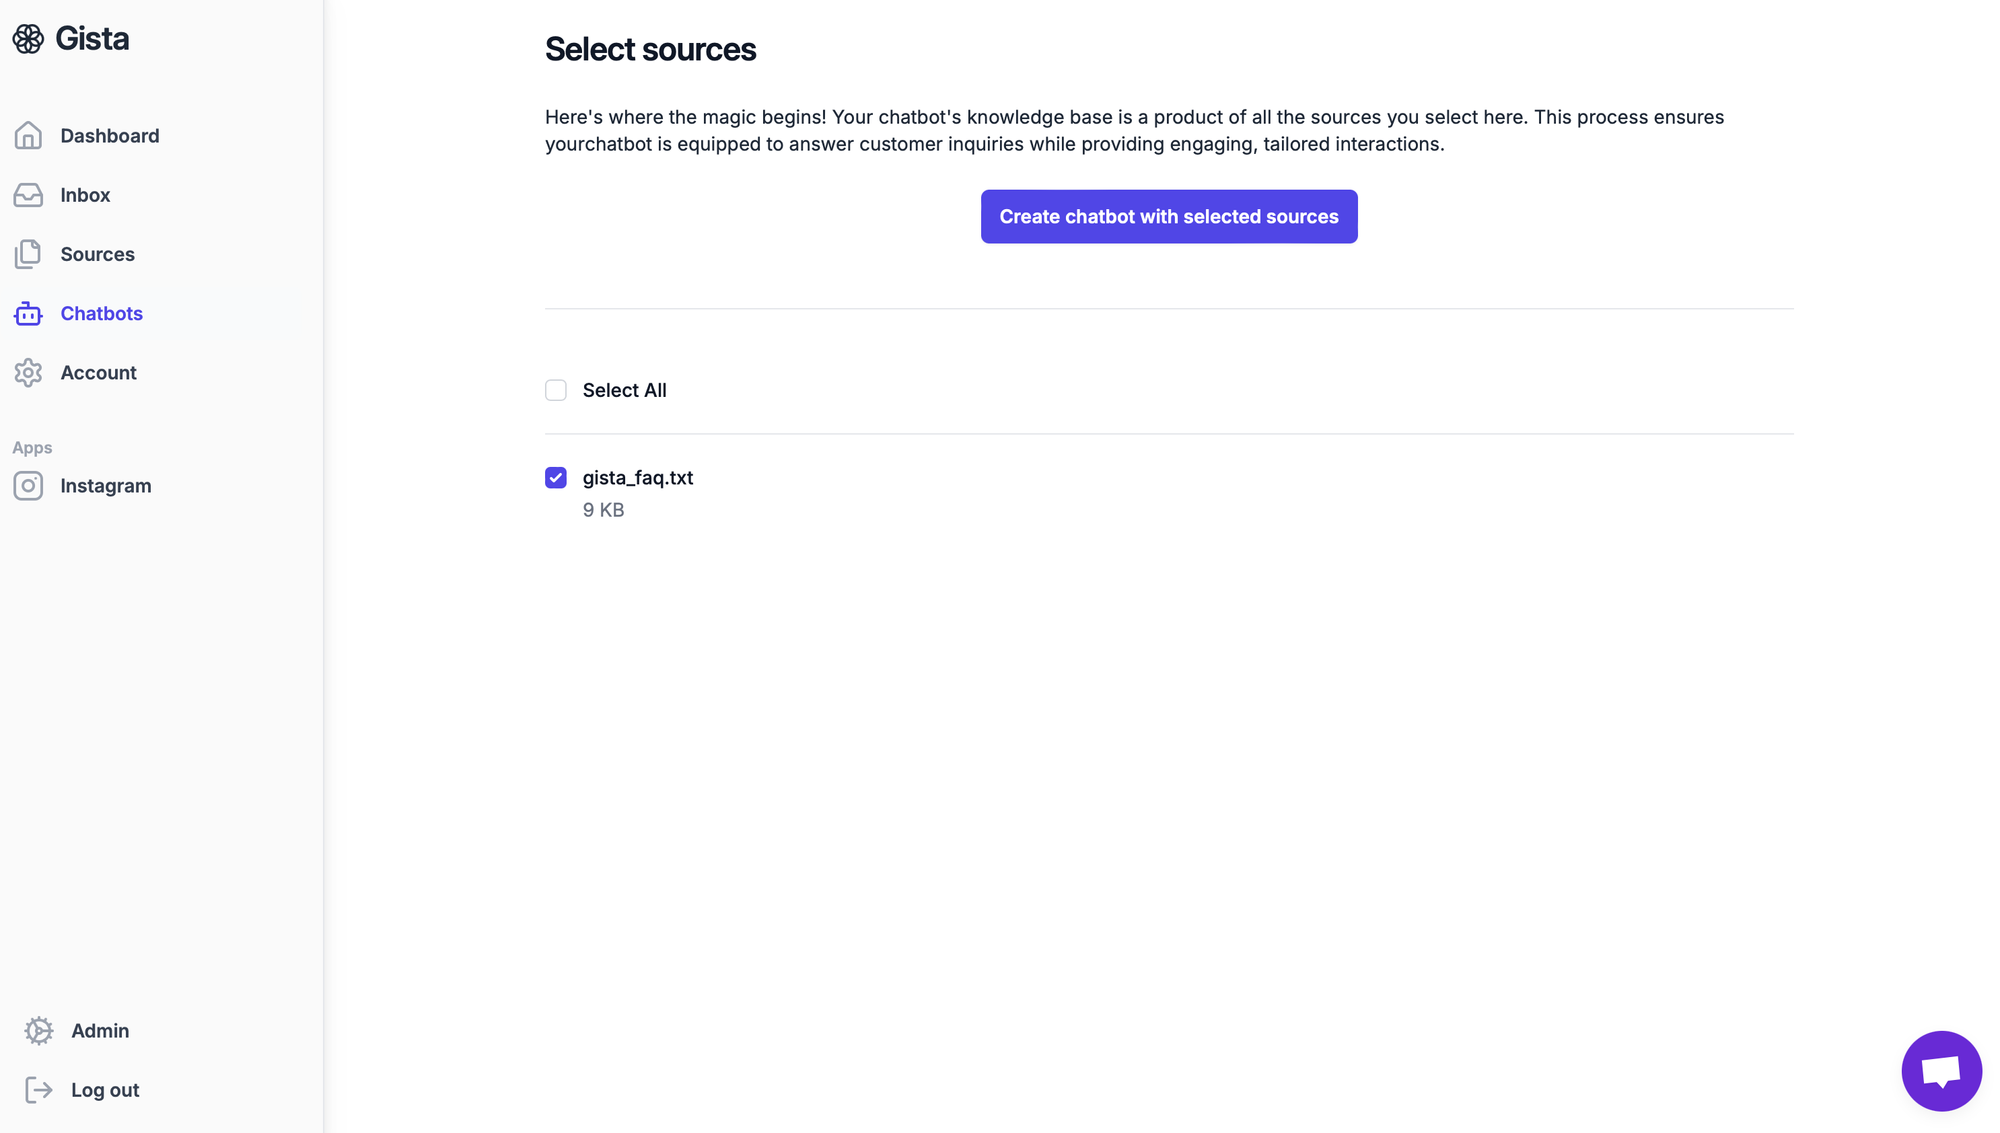
- Create the Chatbot

Okay, at this step your page should look like the screen above. From here we're going to move to the "Chatbot" tab and select the source you uploaded to create the chatbot.

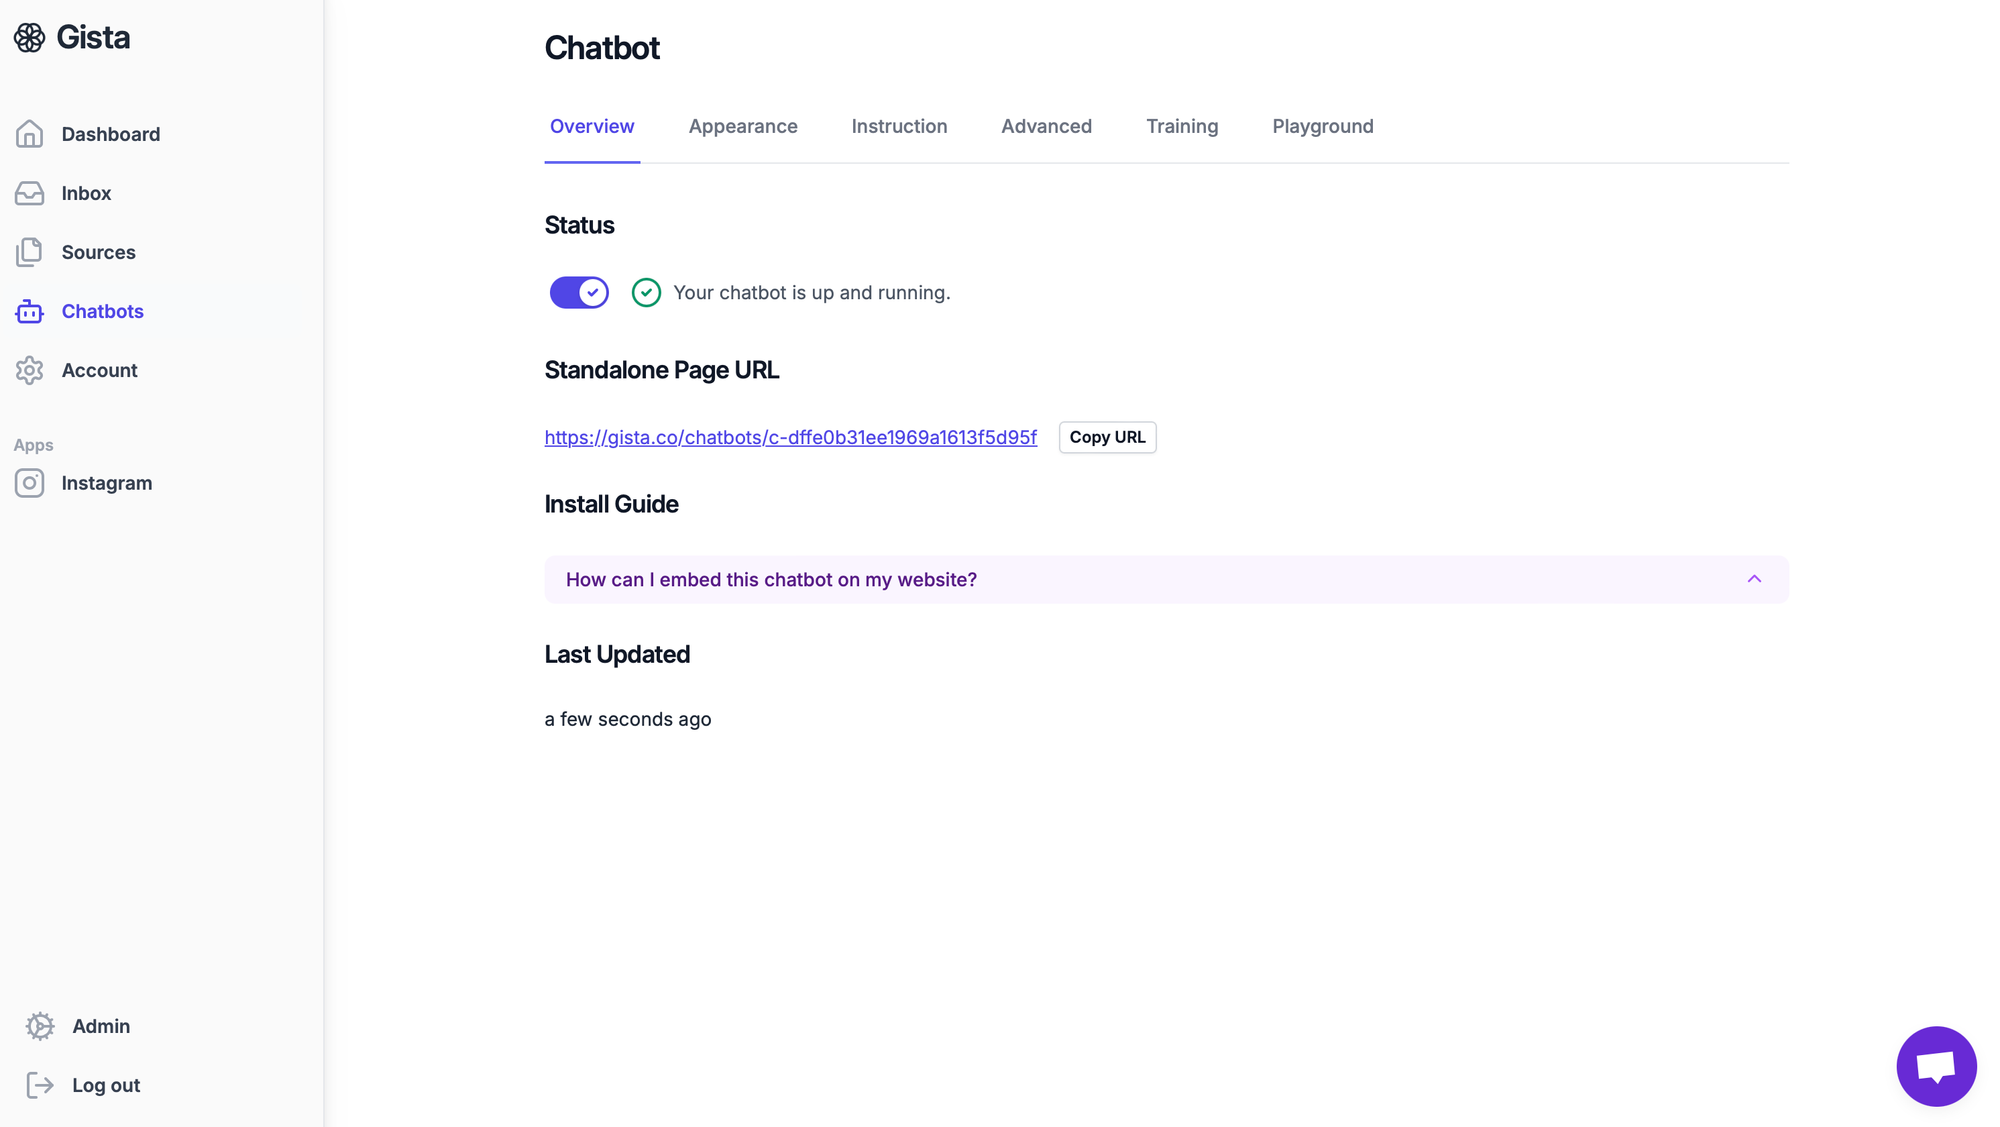
Boom! now you created your very first chatbot! pretty simple right? From this page you can customize the bot to your liking and test in out in the "Playground" tab. For more information on how to link the chatbot to your website, stay tuned to next week's blog post!